Alright, so today, I am going to be going through how I made this sketchy rain effect using Aftereffects and Photoshop.
The first stage is the aftereffects.


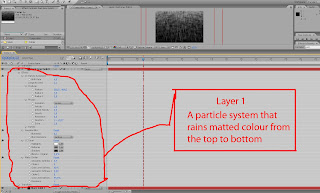
Now, the entire theory was behind this was to create a sort of sketch-like rainy texture that would work well on a single wall scene. I decided to go with a black layer as the bottom, that layer is just a black plane covering the entire region. The first layer is the matte-like painting, I decided to go with the particle system in order to make a particle that sorta rained down, I had to transform it a bit, but it is fairly easy to act with the parameters. CC toner and matte painter had just a few slight touches too it. Nothing made on this is frame animated, it is just from the start parameters all the way. I wanted to make it black and white and add a slight shadow effect too it. Which would become more visible during the max stages.
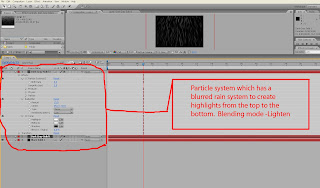
The second layer focused a bit more on the hard lighting that would help with the specular levels. Nearly the same thing, only not the matte choker elements and stuff of that nature. A radial blur element added a sort of distort towards it which was wanted, since I wanted the rain to be unequal. This was mainly done for the specular level. As the previous point, I wanted to make it black and white.
Now for the max part.

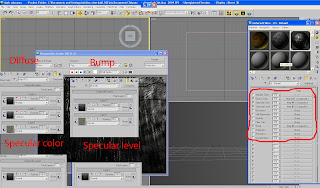
Composite layer fun indeed. The specular levels where fairly straight forward with the second layer I made in aftereffects and rendered out as an AVI. Both specular color and level where gifted with this. I found a generic texture wall where I simply copied it, even on the bump layer and pasted it. Now pay attention to that I actually slightly bumped the rain itself a bit, it creates a slight distortion effect that is hard to see, but adds a bit to the image itself. Also pay attention to the opacity levels and blending modes. The reason I made the bump like this is that it creates a nice feel of volume from this particular perspective.
The bitmap had several maps. The first is the generic texture itself unedited. The second map with 25% opacity is a map which has a subtract blending mode. This is the rendered version from aftereffects with both the specular rain and the matte color. The second layer is a multiply layer with only the matte on it. This basically made the scene dark and gave this radical shadow effect all around that makes it more artistic than in any way realistic.
It should be noted that aside from all this I placed an omni to the top right corner. Nothing too big or worth going through, just a standard omni.
Hope this gave you all a few ideas, remember, if you use auto key or set key for that matter you can animate the opacity of these layers, which in turn can produce some really interesting effects. Animate the omni and I am sure you can create a radical lighting effect.
Ingen kommentarer:
Legg inn en kommentar